
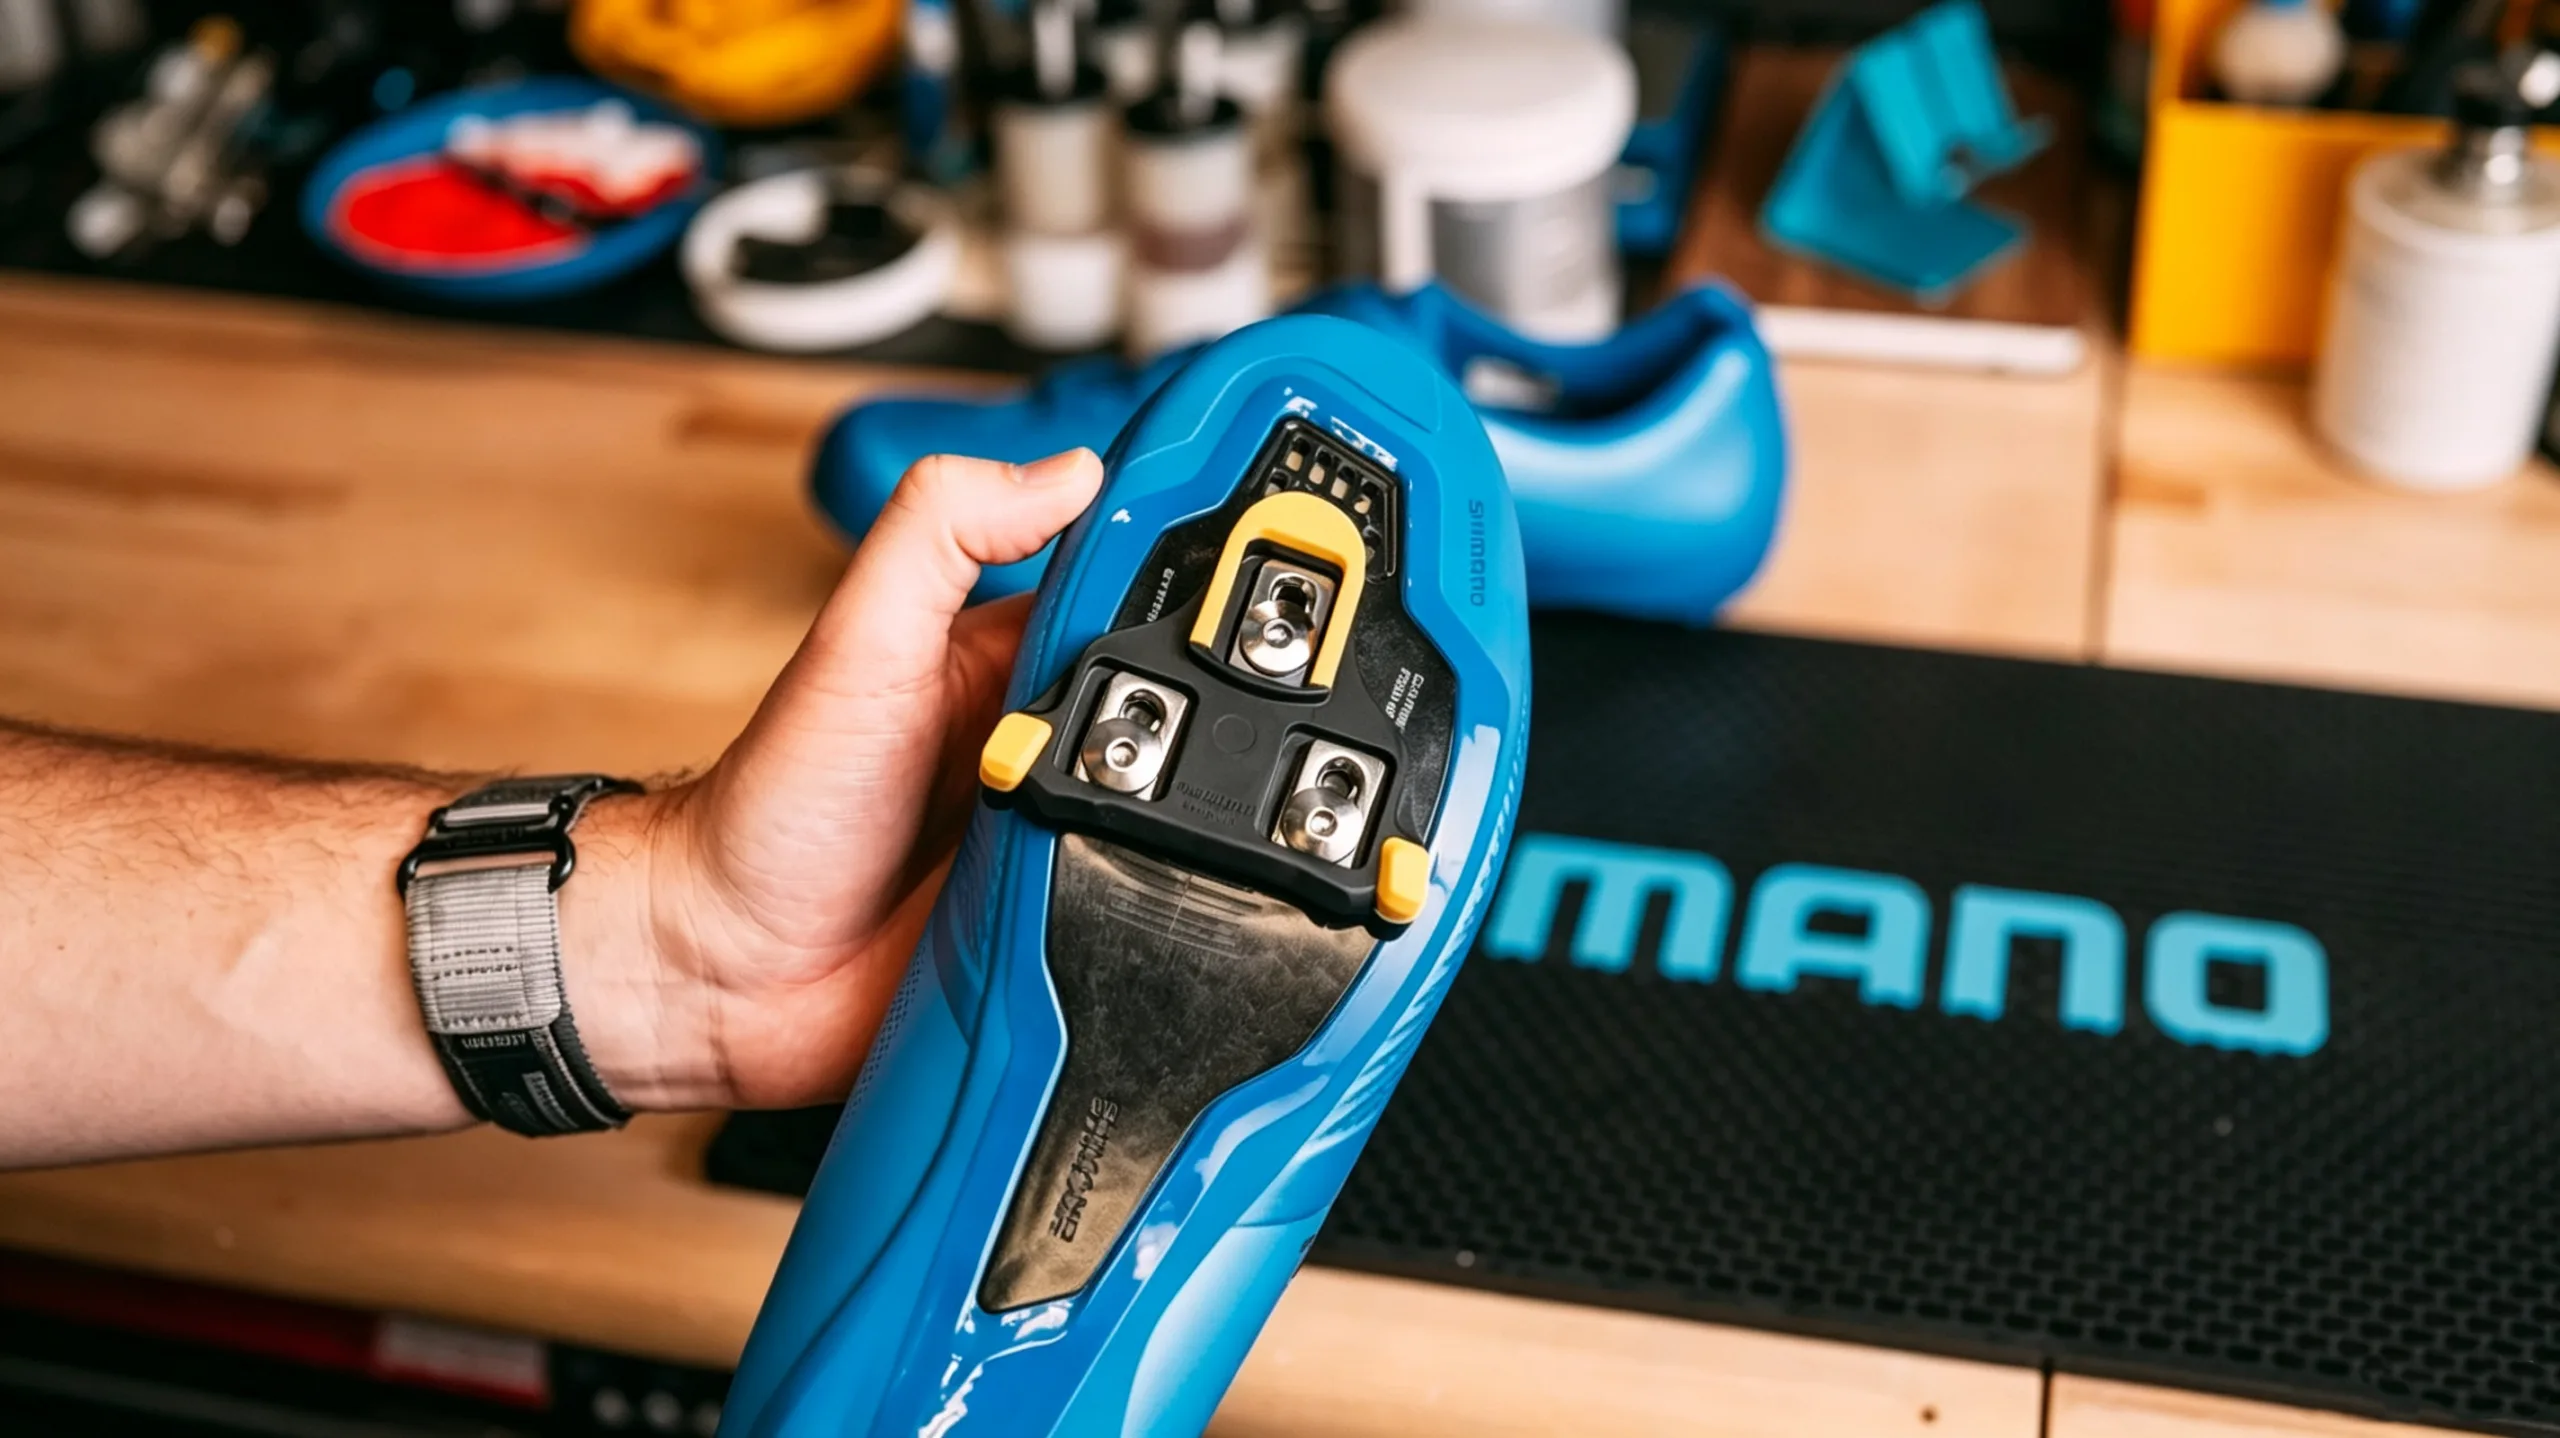
If you use clip-in pedals, cycling shoe cleat position is one of the most important parts of your setup. Your cycling shoes, cleats and pedals work as one system, so the position of the cleat can affect how your foot sits on the pedal and how consistently you maintain that position while riding.
Whether you use road cycling shoes with 3-bolt SPD-SL cleats or cycling shoes with 2-bolt SPD cleats, understanding the basic principles of cleat positioning can help you create a more stable and comfortable setup.
The key adjustments are usually:
- Fore-aft position
- Lateral position
- Cleat rotation
- Float and release characteristics
There is no single cleat position that is perfect for every cyclist. Your shoe fit, pedal system, foot position, riding style and personal comfort all matter.
What Is Cycling Shoe Cleat Position?
Cycling shoe cleat position refers to where the cleat is mounted underneath the cycling shoe.
Unlike flat pedals, clip-in systems connect the shoe mechanically to the pedal through the cleat. This means the position of the cleat determines where your foot sits relative to the pedal.
For example, Shimano SPD-SL uses a three-bolt cleat system designed primarily for road cycling. The cleat attaches to compatible road cycling shoes and creates a stable connection between the shoe and pedal.
For riders using SPD systems, the cleat uses a two-bolt mounting pattern and is commonly found on MTB, gravel, touring, commuting and indoor cycling shoes.
Before adjusting anything, always confirm that your cycling shoes, cleats and pedals are compatible.
Why Does Cleat Position Matter?
The cleat is one of the contact points between your body and the bicycle.
A properly adjusted setup can help you maintain a consistent foot position on the pedal and provide a stable platform for pedaling.
However, cleat position should not be considered separately from shoe fit.
A cycling shoe that is too small, too loose or unsuitable for your foot shape can make it difficult to achieve a consistent setup even if the cleat itself is correctly installed.
For this reason, start with the right cycling shoe size and a secure but comfortable fit before making detailed cleat adjustments.
The Three Main Cycling Cleat Adjustments
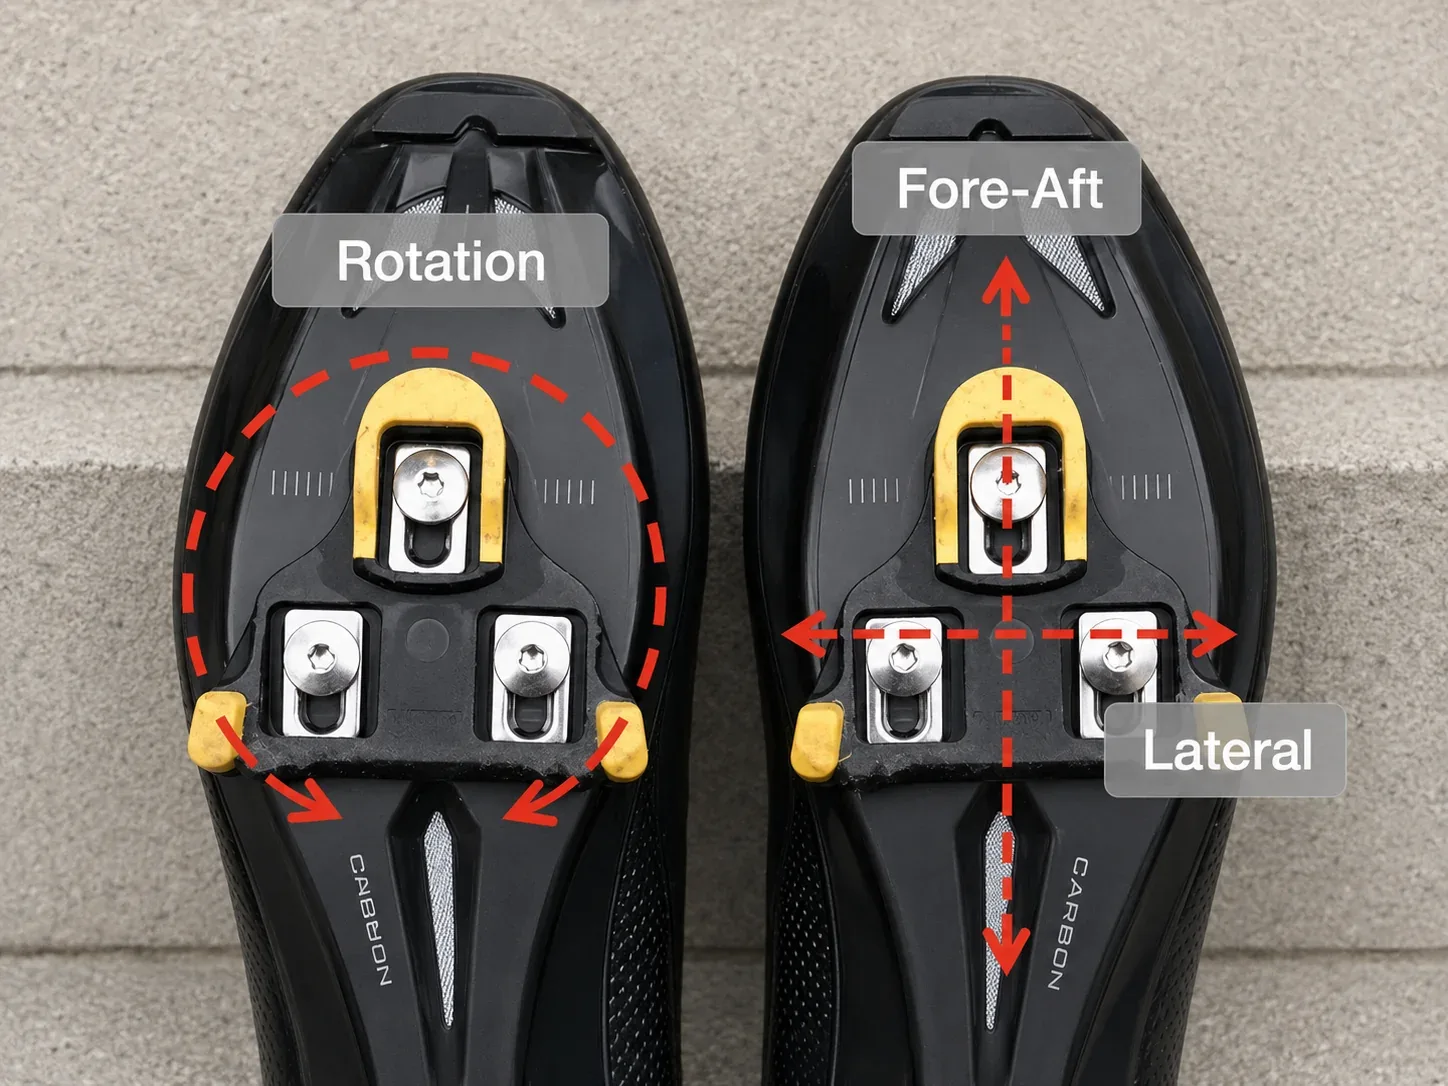
Most cycling cleat setups can be adjusted in three basic directions:
- Fore-aft
- Lateral
- Rotational
Let’s look at each one.
1. Fore-Aft Cleat Position
Fore-aft adjustment moves the cleat forward or backward underneath the cycling shoe.
This changes the relationship between your foot and the pedal axle.
A common starting point is to position the cleat so that the pedal axle sits approximately around the ball-of-foot area, but this should be treated as a starting reference rather than a universal rule.
Different riders may prefer different positions depending on their riding style, foot structure, flexibility and bike setup.
When adjusting the cleat forward or backward, make small changes and test the result rather than moving it a large distance at once.
2. Lateral Cleat Position
Lateral adjustment moves the cleat toward the inside or outside of the shoe.
This changes the side-to-side position of your foot relative to the bicycle.
Small lateral changes can influence stance width and the way your foot aligns with the pedal.
If you are changing this adjustment, make one change at a time and compare how the new position feels during normal riding.
The goal is not to copy another cyclist’s setup. The goal is to establish a stable and comfortable position that works with your own shoes, pedals and riding position.
3. Rotational Cleat Position
Rotational adjustment changes the angle of the cleat relative to the shoe.
This determines the angle at which your foot sits when it is clipped into the pedal.
Avoid assuming that both cleats must be installed at exactly the same visual angle.
Your left and right feet may naturally have slightly different positions, so the final setup may not look perfectly symmetrical.
What matters is whether the position provides a stable and repeatable connection while allowing you to pedal comfortably.
SPD vs. SPD-SL: Does Cleat Position Work Differently?
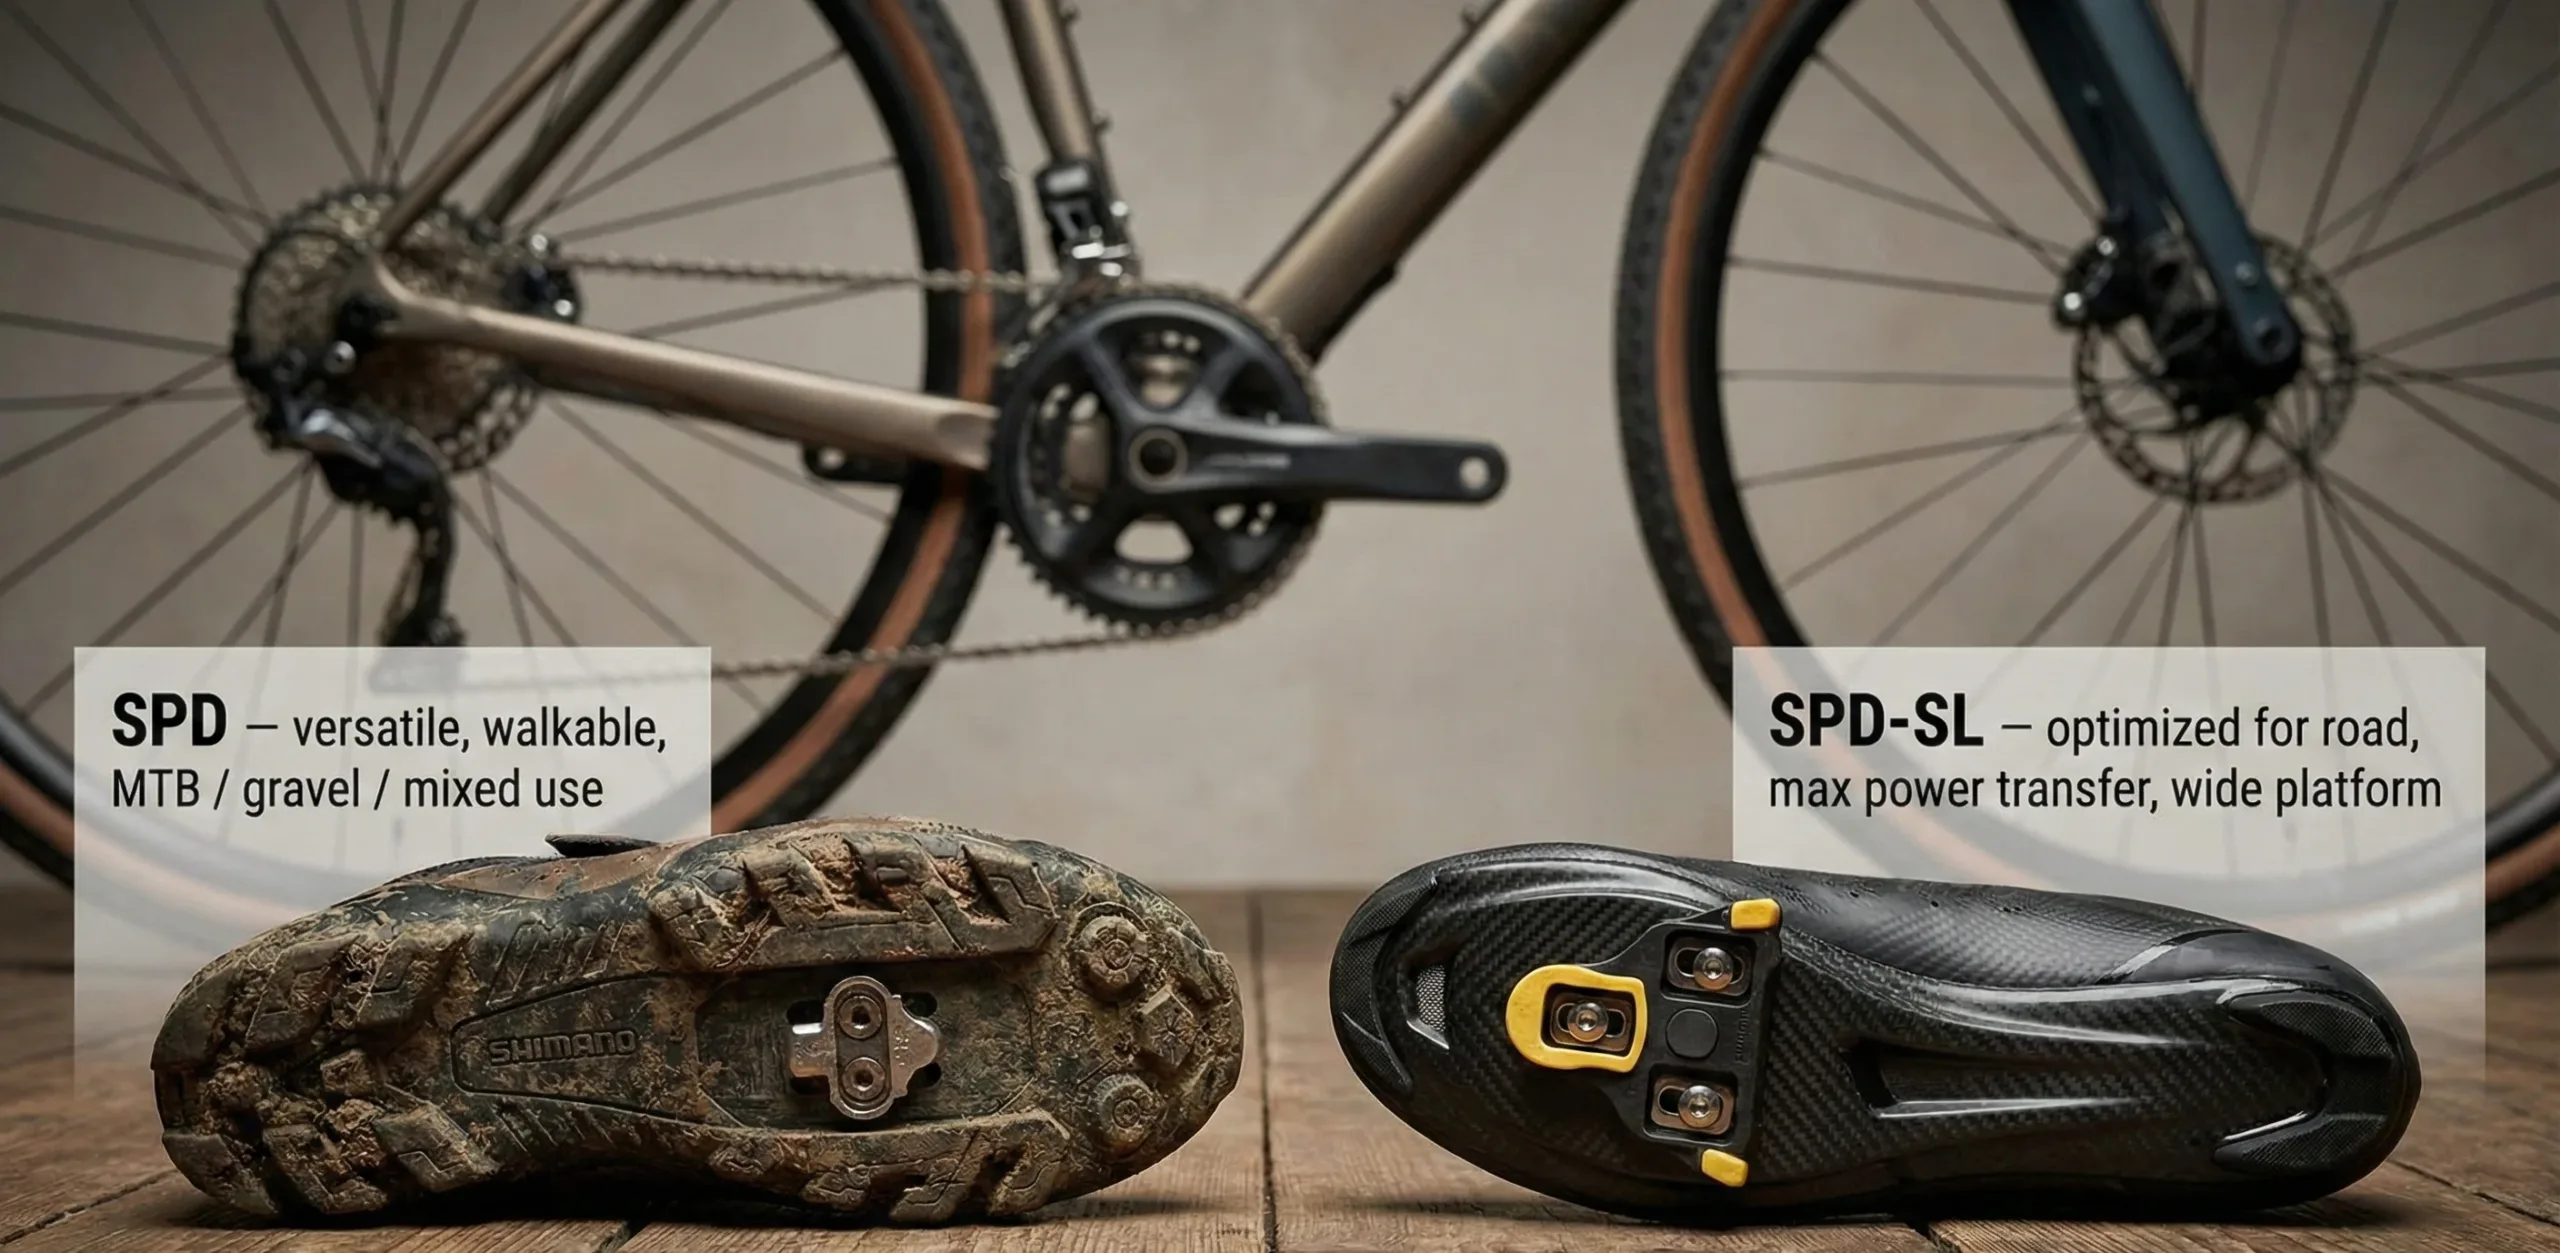
The basic idea of cleat adjustment applies to both SPD and SPD-SL systems, but the mounting systems are different.
SPD
SPD uses a two-bolt cleat design and is commonly associated with MTB, gravel, touring, commuting and indoor cycling.
The cleat is usually recessed into the outsole of compatible shoes, which can make walking easier.
SPD-SL
SPD-SL uses a three-bolt road cleat design with a larger interface.
It is primarily designed for road cycling and is commonly used with stiff road cycling shoes.
Because SPD-SL cleats are larger and generally protrude below the outsole, walking can be less natural than with recessed two-bolt SPD systems.
If you are not sure which system your pedals use, check the pedal and cleat specifications before buying cycling shoes.
How to Install Cycling Cleats
The exact installation procedure depends on the cleat and pedal manufacturer, so always follow the instructions supplied with your specific cleat.
As a general setup process:
Step 1: Check Your Shoe and Cleat Compatibility
First, confirm the bolt pattern of your cycling shoes.
A 2-bolt shoe is designed for compatible SPD-style cleats, while a 3-bolt road shoe is designed for compatible road cleats such as SPD-SL.
Do not assume that every cycling shoe supports every cleat system.
Step 2: Find a Starting Position
Before tightening the cleat completely, choose a reasonable starting position based on the shoe’s mounting range and your normal foot position.
If you are replacing an existing pair of cleats, taking a photo or marking the original position can help you reproduce your previous setup.
Step 3: Install Both Cleats
Install the left and right cleats according to the manufacturer’s instructions.
Make sure the hardware is correctly positioned and tightened to the specified torque.
Step 4: Test Engagement and Release
Before going on a long ride, test clipping in and releasing from the pedals in a safe environment.
Make sure you can engage and disengage the pedals reliably.
This is particularly important for riders who are new to clip-in pedals.
Step 5: Make Small Adjustments
After riding, pay attention to comfort and stability.
If something does not feel right, adjust only one variable at a time.
For example, you can test a small fore-aft change before changing rotation or lateral position.
This makes it easier to understand which adjustment affected the riding feel.
Common Cycling Cleat Setup Mistakes
Even experienced riders can make basic cleat setup mistakes.
Mistake 1: Copying Someone Else’s Cleat Position
A cleat position that works for another cyclist may not work for you.
Foot shape, shoe size, flexibility, riding position and pedal choice are different from rider to rider.
Use another cyclist’s setup only as a reference, not as a fixed target.
Mistake 2: Moving the Cleat Too Much at Once
Large adjustments make it difficult to understand what changed.
Small, controlled adjustments are easier to evaluate.
Mistake 3: Ignoring Shoe Fit
If the cycling shoe itself is too loose or too tight, changing cleat position may not solve the underlying problem.
Your foot should feel securely supported without excessive pressure.
Mistake 4: Assuming Left and Right Must Be Identical
Your feet are not necessarily identical.
The two cleats may require slightly different positions or angles to create a comfortable setup.
Mistake 5: Not Checking Cleat and Pedal Compatibility
A cycling shoe, cleat and pedal need to work together.
For example, a shoe designed only for a 2-bolt SPD cleat is not automatically compatible with a 3-bolt SPD-SL cleat.
Always check the mounting pattern before purchasing or installing cleats.
How Should New Cyclists Set Their Cleats?
If you are new to clip-in pedals, start conservatively.
First make sure your cycling shoes fit correctly and that the cleats are compatible with your pedals.
Then install the cleats using a neutral starting position and test clipping in and releasing before riding outdoors.
For your first rides, focus on becoming familiar with the engagement and release motion rather than trying to find a perfect cleat position immediately.
Once you become comfortable with the system, you can make small adjustments based on your riding experience.
If you continue to experience discomfort or have difficulty establishing a stable position, consider getting help from an experienced bike fitter or qualified professional.
Does Cycling Shoe Stiffness Affect Cleat Setup?
Cycling shoe stiffness and cleat position are related to the overall shoe-pedal connection, but they are not the same thing.
A stiffer cycling shoe can provide a stable platform under the foot, while cleat position determines where that platform connects to the pedal.
For road cycling, many riders choose relatively stiff cycling shoes because they prioritize a stable pedaling platform and consistent foot positioning.
However, stiffness alone does not determine whether a cycling shoe is right for a particular rider.
Fit, comfort, ventilation, closure system, cleat compatibility and riding style should all be considered.
If you want to understand more about cycling shoe sole materials and stiffness, see our guide to [carbon fiber vs. nylon cycling shoe soles].
Cycling Shoe Cleat Position and Road Cycling Shoes
For road cyclists using a 3-bolt system, the cleat and shoe should be considered as one complete setup.
A road cycling shoe normally combines:
- A relatively stiff outsole
- A 3-bolt cleat mounting pattern
- A secure closure system
- A supportive upper
- An appropriate footbed
The combination provides a stable connection between the rider and pedal.
For example, a road cycling shoe with a stiff nylon-based outsole can provide a stable platform without using a full carbon fiber sole.
For riders comparing different cycling shoe sole materials, the actual riding application and desired balance between stiffness, weight, comfort and cost are important considerations.
What About Indoor Cycling?
Indoor cycling makes cleat compatibility particularly important.
Different indoor bikes and studios may use different pedal systems.
Some use 2-bolt SPD pedals, while others use 3-bolt road-style systems such as SPD-SL.
Before buying indoor cycling shoes, check which pedal system your bike or studio uses.
If you regularly ride both indoors and outdoors, consider whether your cycling shoe and cleat system can support both of your riding environments.
Frequently Asked Questions
Where should cycling shoe cleats be positioned?
There is no universal position that works for every cyclist. Fore-aft, lateral and rotational position should be adjusted according to the shoe, pedal system, foot position and individual comfort.
Should cycling cleats be straight?
Not necessarily.
Cleat rotation should reflect your natural foot position rather than forcing every rider into exactly the same angle.
Should both cycling cleats be in exactly the same position?
Not always.
Your left and right feet may have different natural positions, so small differences between the two cleats can be normal.
What is the difference between SPD and SPD-SL cleat positioning?
Both systems allow cleat positioning adjustments, but they use different mounting patterns. SPD uses two bolts, while SPD-SL uses three bolts and is primarily designed for road cycling.
Can I use SPD cleats on SPD-SL cycling shoes?
A standard 3-bolt road shoe does not directly accept a standard 2-bolt SPD cleat unless the shoe or an appropriate adapter system is specifically designed to provide that compatibility.
Always check the shoe and adapter specifications before mixing systems.
How often should I check my cleat position?
It is a good idea to check your cleats when installing new cleats, changing cycling shoes, replacing pedals or noticing a change in foot position or riding comfort.
Should I get a professional bike fit?
If you cannot establish a comfortable position, have persistent discomfort or are making significant changes to your riding setup, a professional bike fit can be useful.
Choosing the Right Cycling Shoes for Your Cleat System
Before buying cycling shoes, consider these five factors:
- Cleat compatibility
- Shoe size and fit
- Outsole stiffness
- Closure system
- Riding environment
The correct order is simple:
Pedal → Cleat → Shoe → Fit → Position
Start by identifying the pedal and cleat system you use. Then choose compatible cycling shoes and adjust the cleat position to create a stable and comfortable connection.
For more information about choosing the right cycling shoes, you can also read our [cycling shoe size guide] and our guide to [SPD vs. SPD-SL].
Cycling Shoes for Brands, Wholesalers and Distributors
For cycling brands, distributors and retailers, cleat compatibility is also an important specification when selecting cycling shoes for your product range.
A road cycling shoe with a 3-bolt cleat interface can target a different market segment from a flat-pedal cycling shoe or a 2-bolt MTB cycling shoe.
When developing a private label cycling shoe collection, brands can consider different combinations of:
- Road or MTB positioning
- 2-bolt or 3-bolt cleat compatibility
- Nylon or carbon-based outsole
- Rotary closure or other closure systems
- Upper materials
- Ventilation
- Size range
- Branding and packaging
Starting from an existing cycling shoe platform can also be an option for brands that want to reduce development complexity.
If you are looking for a cycling shoe manufacturer for your brand, you can learn more about our [OEM cycling shoe manufacturing service].

Final Takeaway
The right cycling shoe cleat position is not about copying a fixed measurement from another cyclist.
Instead, start with compatible cycling shoes, cleats and pedals, establish a sensible starting position, and then make small adjustments based on your individual foot position, riding style and comfort.
For road cyclists, understanding the difference between 3-bolt SPD-SL and 2-bolt SPD systems is also essential before choosing cycling shoes.
A good cycling shoe setup should provide a secure connection while allowing you to ride comfortably and consistently.
If you are a cycling brand, wholesaler, distributor or retailer looking for road cycling shoes, MTB cycling shoes or private label cycling shoe production, contact us to discuss available models, samples and OEM customization options.